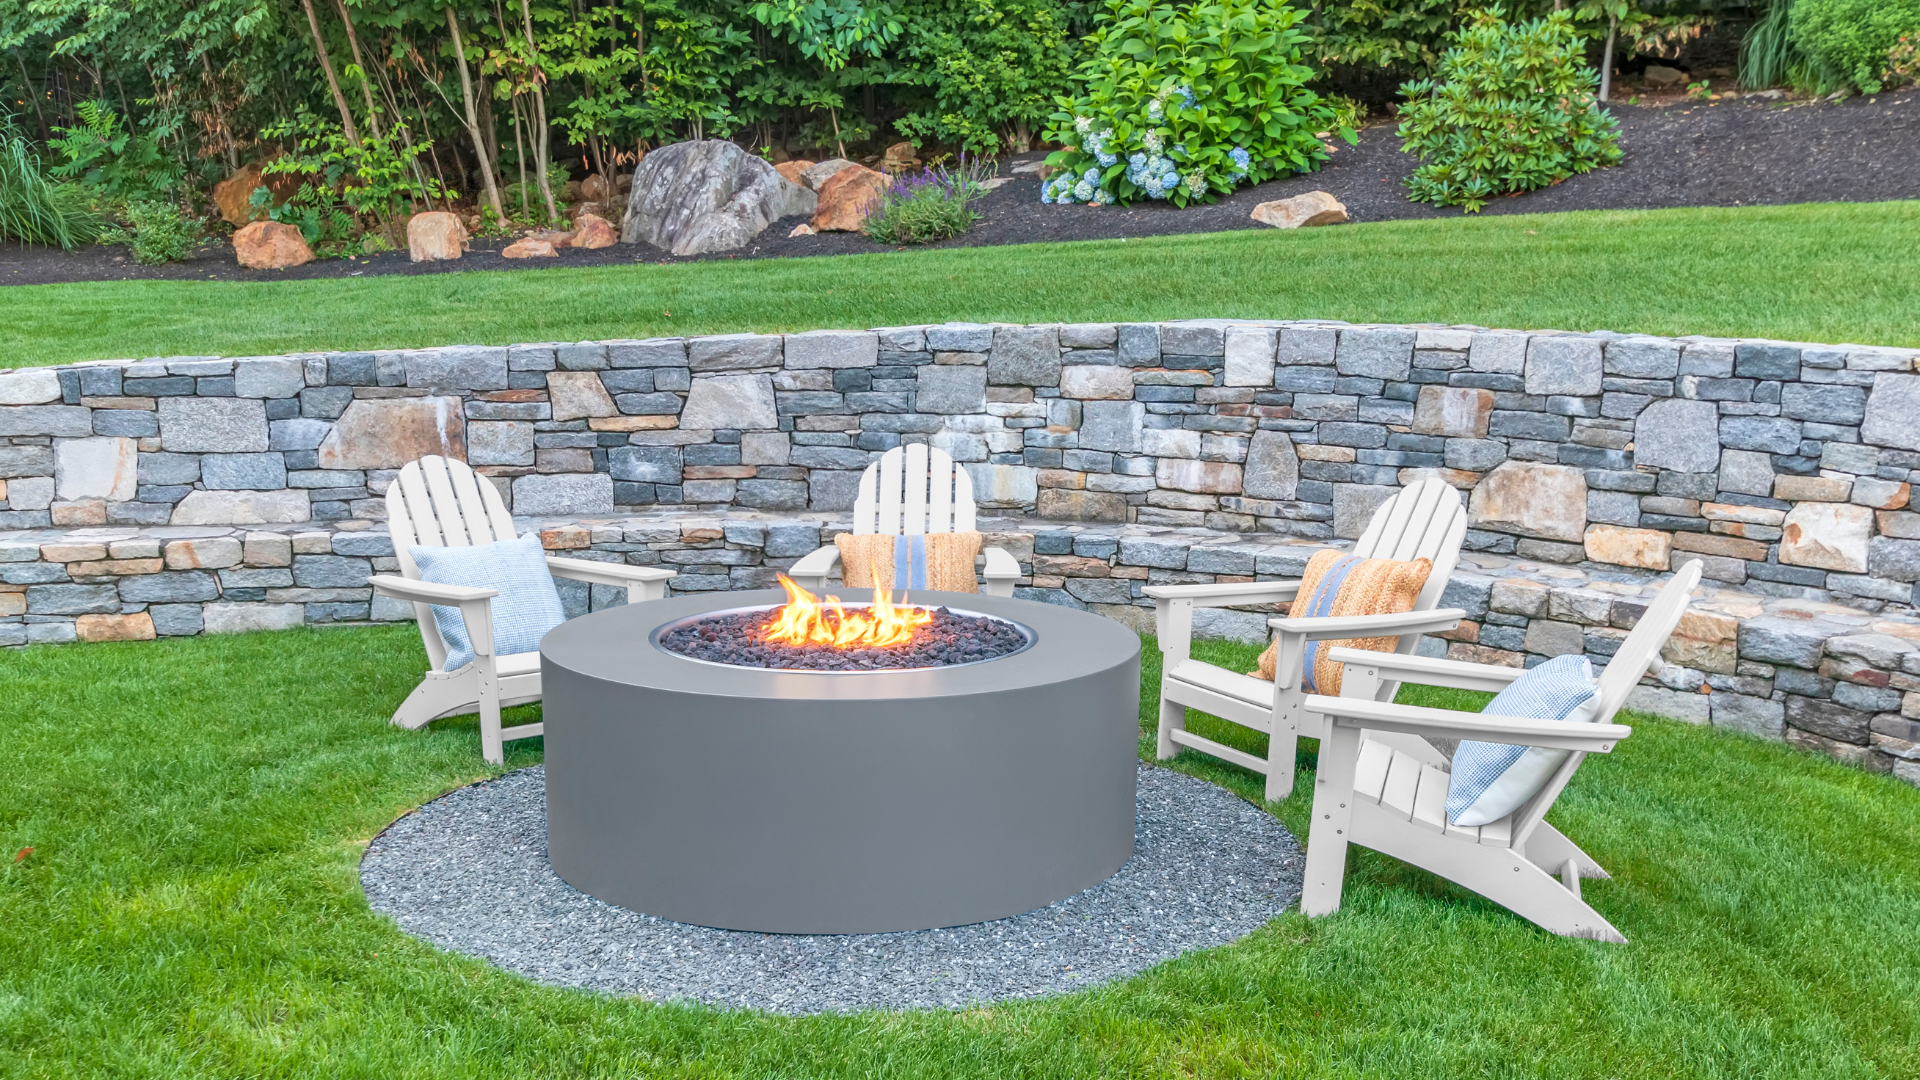
The allure of a crackling fire, under the vast expanse of the starlit sky, is a timeless pleasure. Yet, the charm of this setting isn’t just about the fire pit itself, but also the seating that surrounds it.
But what if you’re working within a budget? Fear not!
Bringing comfort and style to your backyard doesn’t have to break the bank. In this guide, we delve into DIY fire pit seating ideas that are not only budget-friendly but also effortlessly enhance the ambiance of your outdoor sanctuary.
Contents at a Glance
Best 8 Outdoor DIY Fire Pit Seating Ideas
Last year I decided to build a garden pond myself in my backyard. Digging out the shape and installing the flexible liner was so satisfying. Though it took time and planning, I enjoyed the whole process since I could customize it perfectly to my vision. Seeing the finished tranquil pond with floating flowers and flickering fish energizes me.
This DIY approach let me design every detail, saved money, and taught me new skills. If you are reading this article, you probably like to build things yourself from time to time.
You can implement many rustic fire pit seating ideas in a “Do It Yourself” format to fulfill your vision. As I learned with my pond project, DIY provides a great sense of accomplishment, sparks creativity, saves money, builds skills and allows for personal customization that people find very fulfilling.
With a little creativity and DIY spirit, you can transform your fire pit area using affordable or repurposed materials.
So here are some backyard outdoor fire pit seating ideas in a DIY format using cheap outdoor seating materials.
1. Pallet Seating
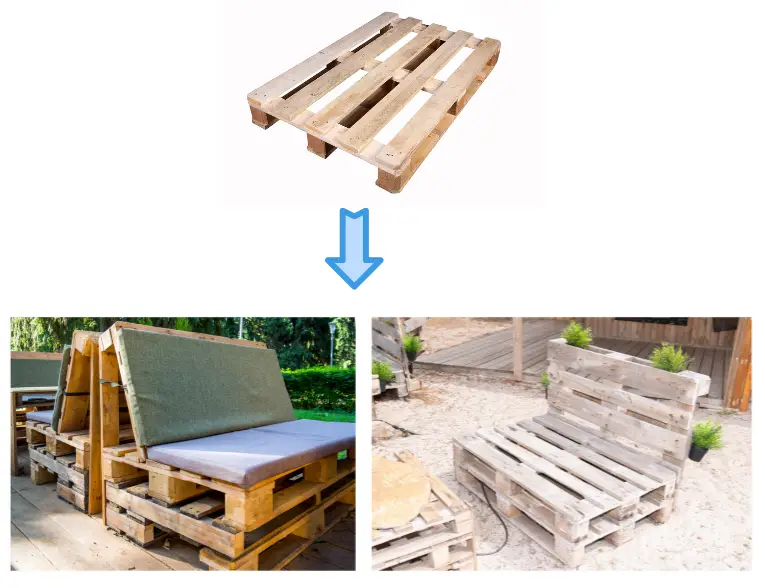
The first fire pit seating idea that came to my mind is to make seats out of pallets and cushions. This concept involves repurposing wooden pallets as the base for seating arrangements, diverting them from landfills. The cushions used are typically made from recycled materials such as reclaimed fabric and foam, contributing to sustainability.
The seating can be customized to fit the fire pit area, and the use of recycled materials aligns with eco-friendly principles while providing a cozy place to enjoy the warmth and ambiance of the fire.
Materials needed:
- 2-3 wooden pallets
- Sandpaper
- Wood stain, paint, or preservative
- Drill with screws or construction adhesive
- Scrap fabric, old cushions, blankets
- Staple gun
Here are the 5 steps to make pallet Seating with recycled cushions for your fire pit seating area:
- Sanding and finishing pallets: Sand rough areas on pallets. Apply stain, paint, or preservative. Allow to dry completely.
- Arrange pallets: Stack pallets of the same height or screw or glue several pallets together into the desired shape.
- Cut fabric: Cut fabric scraps and old cushions to fit pallet seats. Place plastic sheeting under fabric for cushioning.
- Stretch and staple fabric: Stretch fabric over pallet seats and staple it around the edges and across the center.
- Fluff and place cushions: Fluff and place cushion covers on pallet seats. Mix and match prints and colors for an eclectic look. Place seats around the fire pit.
2. Log Stump Seating
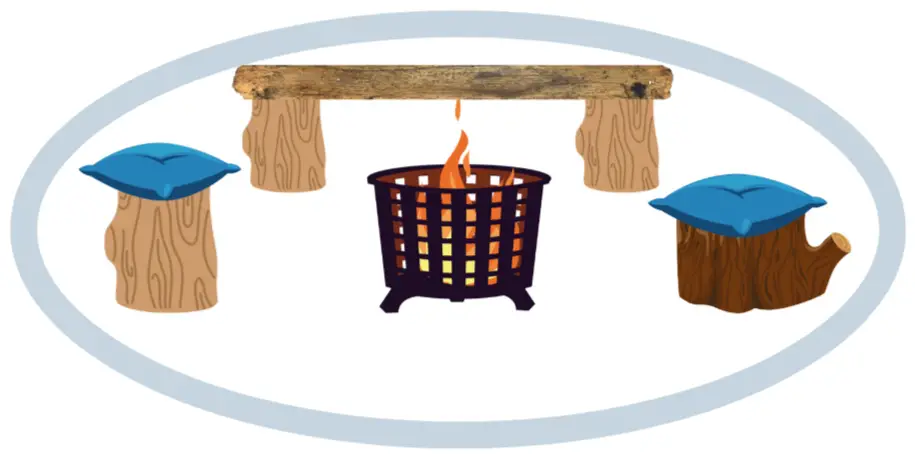
Rough, organic, and irresistibly cozy — Log Stump seating brings the essence of the forest to your outdoor oasis. These rugged seats crafted from sliced tree stumps or logs add a touch of rustic wilderness to patios, gardens, and gathering areas.
Materials you’ll need:
- Log stump (A raw, preferably weather-resistant wood like cedar or redwood. Ensure it’s a freshly cut stump or one that hasn’t started rotting)
- Sandpaper or sanding machine
- Penetrating oil or wood sealer
- Decorative Enhancements (optional)
- Cushions or Pads (optional)
- Protective gear like safety glasses and gloves
- Chainsaw or handsaw
Let’s make log stump seating together in simple steps:
- Selection and slicing: Opt for weather-resistant wood types like cedar or redwood. Slice the log to your desired thickness, retaining the natural bark for a rustic look or removing it for a smoother finish.
- Refinement and protection: Sand the log stump to smooth out rough patches. Apply a protective coat of penetrating oil to preserve its natural charm and protect it against weather elements.
- Personalize and accessorize: Enhance your log stump by adding decorative wood burns, carving edges, or even incorporating a backrest. Complement the seating with colorful cushions for added comfort and style.
In just these few steps, you can transform a simple log into a rustic, inviting seating area for your outdoor space.
3. Driftwood Furniture
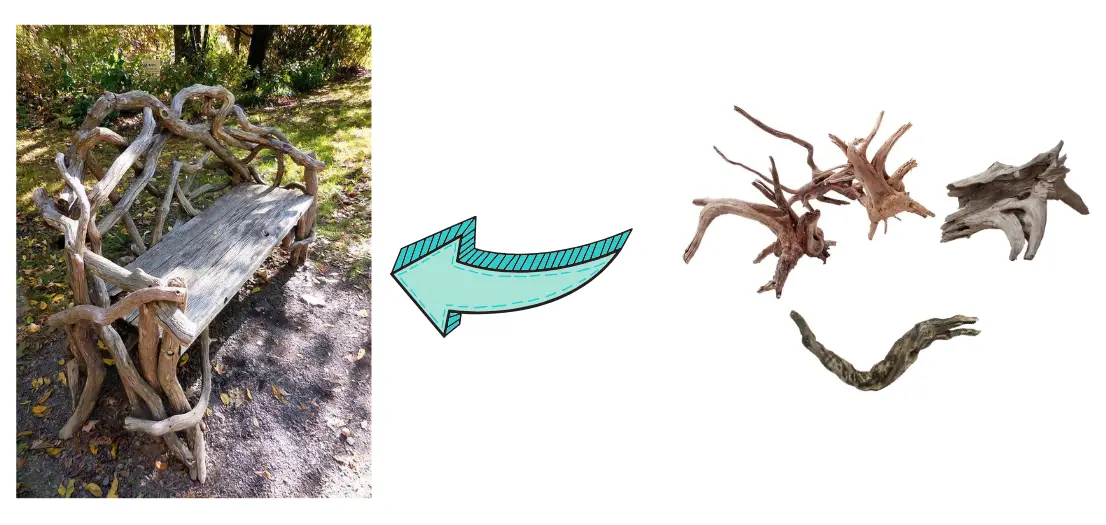
Driftwood, brought ashore by oceans or rivers, can be transformed into rustic furniture pieces such as benches, chairs, and tables for fire pit areas. Its weathered, organic texture exudes coastal charm.
Creating seating from driftwood offers a delightful, eco-friendly DIY endeavor. Here are some steps and suggestions to kick-start your project:
- Collect driftwood: Scout for driftwood along beaches or buy it from craft stores. Opt for straight pieces robust enough to bear weight.
- Design your furniture: Determine the kind of seating you envision – be it a chair, bench, or stool. For design ideas, explore online sources or design publications.
- Preparation: Thoroughly brush the driftwood to cleanse it, and utilize sandpaper to smoothen any rough patches. Tailor the driftwood to your desired dimensions using appropriate cutting tools.
- Assembly: Fasten the driftwood sections using wood glue, screws, or other suitable fixings. It’s advisable to follow a tutorial or design guide to guarantee the furniture is both sturdy and safe.
With its knots, holes, and irregular shapes, each driftwood furniture piece will be unique. Position chairs or benches around the fire pit, using larger logs or tree slices as side tables.
Driftwood’s coastal allure and sustainability make it a creative eco-friendly choice over store-bought furniture. Let the waves inspire you as you craft each coastal-inspired driftwood piece.
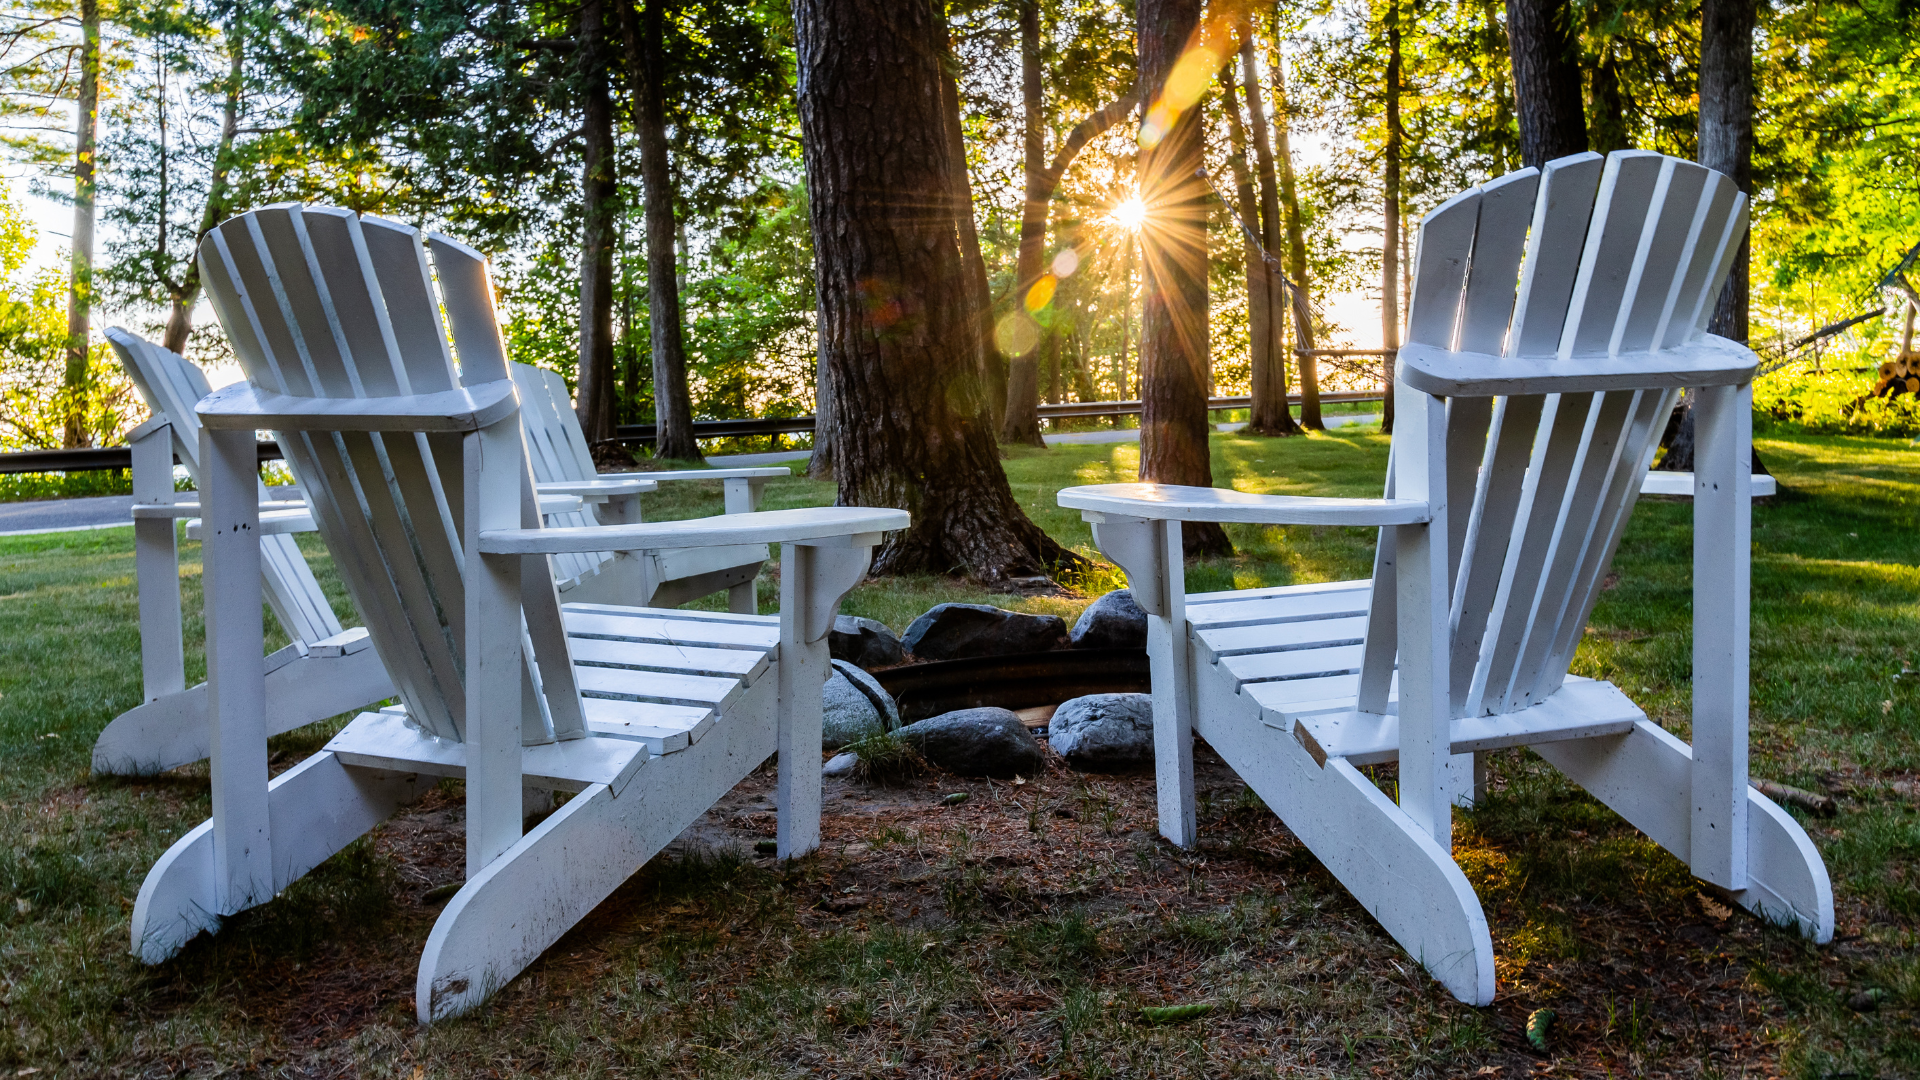
4. Adirondack Chairs
Adirondack chairs, with their signature wide armrests and sloping seatbacks, have become an emblematic fixture of outdoor relaxation. Pairing them with a fire pit accentuates the coziness and charm of any outdoor setting. What’s even more appealing is the DIY aspect of these chairs – building one from scratch is not only fulfilling but also customizable to personal preferences.
To create Adirondack chairs, you’ll need the following materials:
- Wood boards
- Screws
- Wood glue
- Sandpaper or sanding Machine
- Paint or wood stain (optional)
- Protective gear
- Saw
- Drill
By preparing these materials ahead of time, you’ll be well-equipped to create your very own Adirondack chair tailored to your outdoor space. Now that we have everything we need, we can begin the assembly process:
- Additional cuts for stringers: If required by the blueprint, make added cuts for the stringers, ensuring they bridge the seat and backrest aptly.
- Legs and arm support: Affix the legs to an arm support. This element links the chair’s front and back legs, ensuring stability.
- Crafting curves: Sculpt the distinct curved sections for both the backrest and seating area.
- Trimming and tapering: Refine the previously cut curves to desired dimensions. Subsequently, taper the back slats to complement the backrest’s curve.
- Assembly: This is the final and most satisfying step. Systematically assemble the chair, starting with the seat, followed by the backrest, and culminating with the broad armrests.
Whether you’re sitting by a fire pit, enjoying the warm glow, or just lounging in your garden, Adirondack chairs amplify the experience. The sense of accomplishment from crafting your own chair, tailored to your preferences, is unparalleled.
5. Barrel Seating
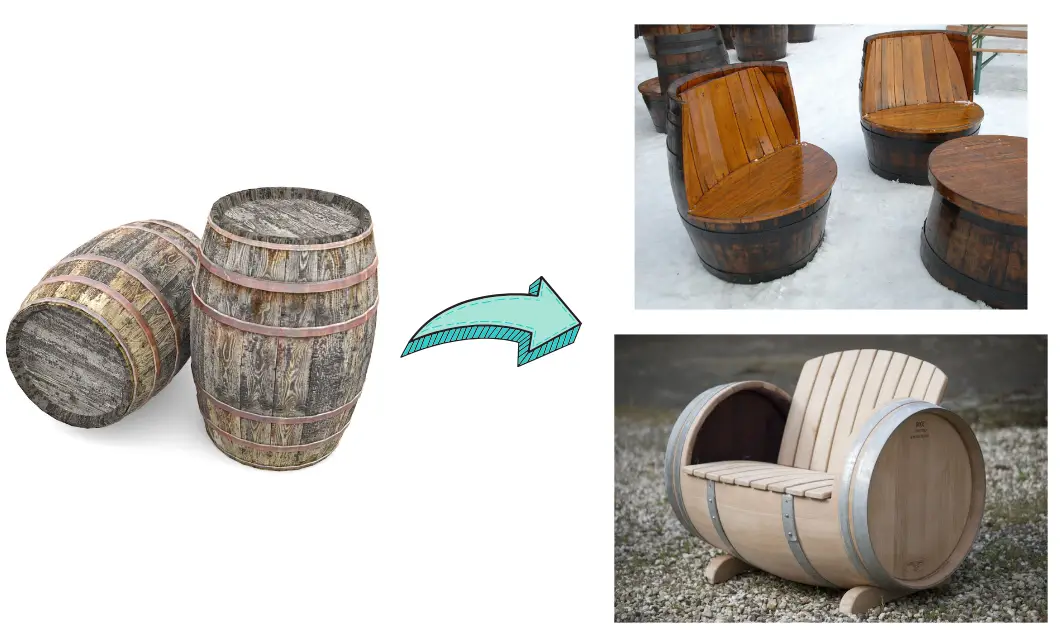
The allure of fire pit gatherings is about to get a rustic upgrade! Imagine sitting around warm flames, ensconced in chairs crafted from old oak whiskey or wine barrels. This intriguing fire pit seating idea not only adds a touch of vintage charm to your outdoor setting but is also a testament to eco-friendly repurposing.
Materials you will need: a barrel, angle grinder with a thin cutting disc, Dremel tool, sandpaper, 18 mm plywood, foam padding, leather or durable fabric, paint, shelving brackets, riveter, plywood for the back panel, screws, and car trim edging.
Turn used oak whiskey or wine barrels into creative fire pit seating in 9 steps:
- Designing the cut: While there are various ways to cut the barrel, a popular choice provides a high back and yields two chairs from one barrel. To begin, measure the barrel and create a virtual ‘opened out’ design using a CAD program to visualize your end result.
- Marking the barrel: Cut the radius of the curves on paper, helping you trace them on the barrel’s curved surface. Find the barrel’s center (often indicated by its logo), then sketch the cut lines using a pencil. Ensure symmetrical cuts.
- Cutting process: Equipped with an angle grinder (with a thin cutting disc) and a Dremel, start by re-tracing pencil lines using the Dremel. This makes the lines more visible. Use the angle grinder for straight cuts, and the Dremel for more intricate curves. After cutting, sand the edges to remove sharpness.
- Crafting the seat and backrest: Using 18 mm plywood, cut a circle fitting the barrel’s diameter. Cushion this using foam (an old mattress can be recycled for this). Finally, stretch and staple leather (or any durable fabric) over this to form the seating and backrest.
- Painting: Consider painting the inside of your barrel to enhance its aesthetics. A dark shade for the base and a brighter one for the upper half can create a vibrant contrast.
- Attaching the seat: Use cheap shelving brackets to fix the seat onto the barrel. A riveter can be an efficient tool for this purpose.
- Adding a back panel: For added comfort, consider a back panel made of plywood. Cover it similarly to the seat and attach it to the barrel using screws.
- Detailing with edging: Use car trim edging to cover any exposed edges of the barrel. This not only provides a neat finish but also ensures safety.
- Replicate and reflect: With one chair complete, you can easily replicate the process for the second one. Once done, place your chairs around a fire pit or in your garden, and relish the coziness they bring!
Creating barrel seating is a project that marries functionality and aesthetic appeal. The satisfaction derived from sitting on a chair you crafted is unparalleled. Dive into this DIY journey and enrich your outdoor space with a touch of rustic elegance.
6. Tire Seating
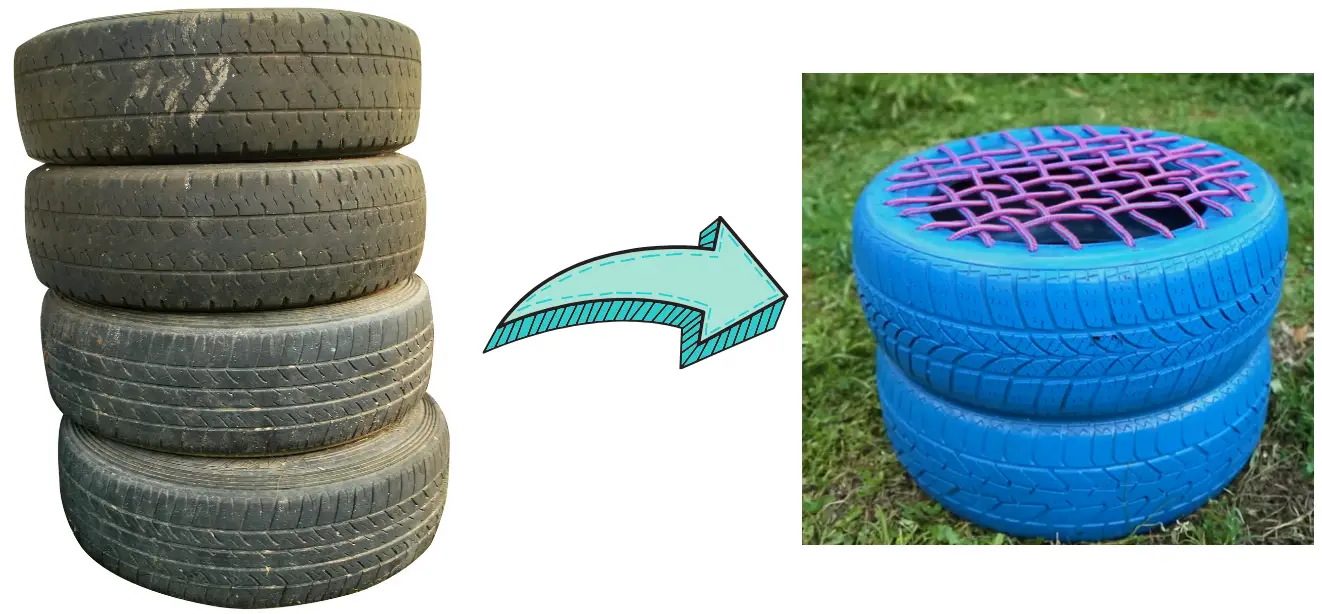
Tire seating for fire pits offers a unique outdoor seating option, repurposing old tires into functional seats. This is both an innovative and cost-effective way to enhance your backyard fire pit area.
Make sure you have these materials ready in advance:
- Old tires
- Plywood
- Foam
- Fabric
- Staple gun
- Screws or bolts
- Paint (for decoration)
- Outdoor cushions and pillows (for comfort)
To craft tire seating, follow these steps:
- Prepare the plywood: Cut the plywood into circles slightly larger than the tire’s diameter.
- Foam cut-outs: Slice the foam into circles matching the size of your plywood circles.
- Attach the fabric: Drape the foam circles with fabric, then staple this fabric onto the plywood’s back.
- Affix the plywood: Position the plywood circles atop the tires, securing them with screws or bolts.
- Decorate the tires: Paint the tires in lively, striking colors for a fun aesthetic. Enhance comfort with outdoor cushions and pillows. Mix and match colors and materials for added visual appeal. It’s the perfect opportunity to repurpose those neglected tires!
Additionally, it’s worth noting that tire rims can also be transformed into fire pits. While I won’t delve into the specifics here – our focus is primarily on handcrafted fire pit seating ideas – it’s a great concept to explore further.
7. Brick Seating
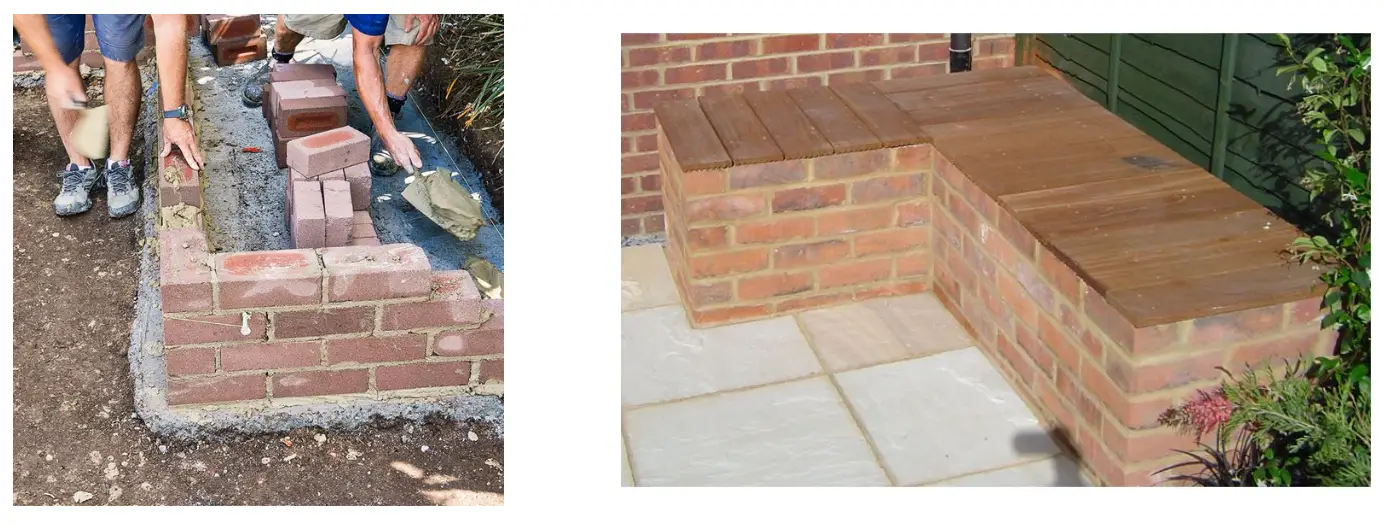
Brick seating offers a durable and charming addition to any fire pit area. Not only are bricks sturdy and resistant to both heat and weather, but they also add a classic touch to outdoor spaces.
Materials you will need:
- Standard bricks
- Sand or gravel (for base preparation)
- Mortar (for permanent seating)
- Spare bricks (for decorative borders)
- Blankets or pillows (for comfort)
Steps to craft brick seating:
- Planning: Visualize the seating design and gather necessary materials, including standard bricks and sand or gravel for the base.
- Base preparation: Level the chosen area and spread a layer of sand or gravel for stability.
- Lay bricks: Start with a foundational layer of bricks flat on the ground. For wider seating, stagger bricks by overlaying them partially on the layer below.
- Stabilize: For permanent seating, apply mortar between bricks for added strength.
- Design touch: Add decorative borders using spare bricks for an elevated look.
Let me tell you right now, sitting on bricks will be cold and you can freeze your bottom. So put a blanket on the brick seat or use a pillow to ensure warmth and comfort during those chilly evenings.
8. Cinder Block Benches
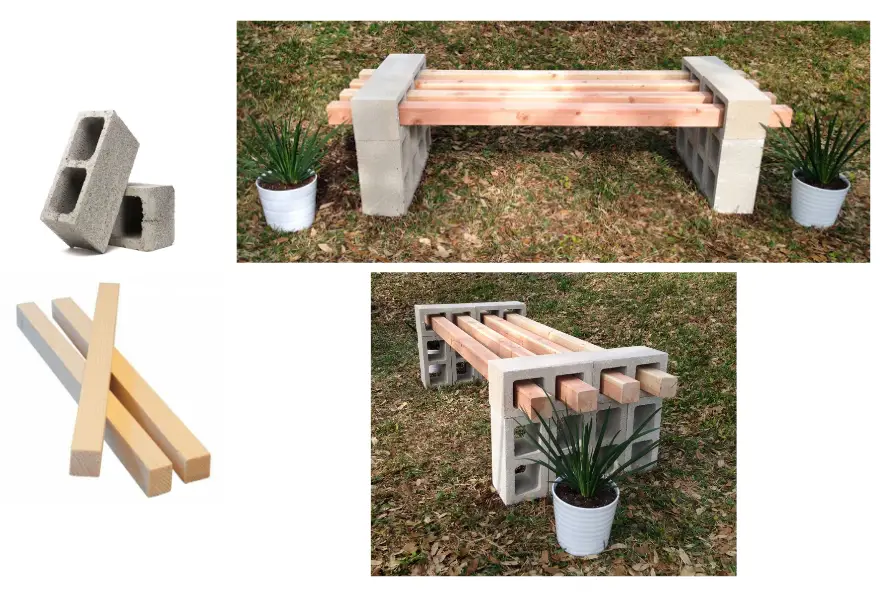
Cinder block benches are a great DIY seating option for outdoor spaces like gardens, patios, and backyards.
What you will need to make cinder block benches:
- Standard cinder blocks
- Mortar
- Wooden plank
- Construction adhesive or cement
- Paint or stains
- Cushions
- Stone or brick (optional), If you decide to incorporate additional design elements to the bench.
Here’s a 4-step guide to constructing your own cinder block bench:
- Base setup: Begin by laying out your design. Depending on the desired length and shape of the bench, stack standard cinder blocks with hollow centers. For a broader seat, place additional blocks horizontally atop the initial vertical stacks.
- Stabilizing the structure: While simple designs might stand firm without any adhesive, for added stability, consider using mortar between the cinder blocks. This ensures the blocks remain firmly in place, especially if the bench will frequently be used.
- Seat installation: Once your cinder block base is ready, measure and cut a wooden plank to fit the bench’s length and width. Secure this plank atop the cinder block structure using construction adhesive or cement. This plank serves as the primary seating surface.
- Personalize your bench: The beauty of cinder block benches lies in their versatility. Leave the bench in its natural form or add character with paint or stains. Incorporate cushions for comfort, or perhaps combine cinder blocks with other materials like stone or brick for added design flair.
With just a few materials and a touch of creativity, you can craft a bench that not only serves as a comfortable bench fire pit seating idea but also as a conversation starter.
If you are looking for a fire pit for your patio, backyard or pool area, I’ve made a list of the best propane fire pit tables.
Frequently Asked Questions
Here are some common questions about DIY fire pit seating ideas:
1. How Big Should Your Fire Pit Seating Area be?
When determining the right outdoor fire pit seating area dimensions, one of the most important factors is choosing the proper size of fire pit seating area. The dimensions you select impact both visual appeal and safety.
A good general guideline is allowing at least 7 feet of clearance around the outer edge of the fire pit itself. This provides ample room for seating without feeling crowded. For wood burning pits, position chairs 24-36 inches back from the flames. Gas fire pits can be a bit closer at 2 feet.
On a patio, allocate a 12-foot diameter circle as a minimum size. This allows easy movement for guests accessing seats. Smaller patios can scale down appropriately based on the actual fire pit width.
Careful spacing is crucial for safety. Sitting too near risks getting burned. Sitting too far diminishes the cozy vibe. The goal is to find a layout that enables conversation while preventing sparks from reaching chairs.
Factor in your planned number of seats, seating types, and overall patio size. Curved benches around a pit are ideal, as they occupy less space than chairs. Just be sure to allow passing room behind them.
2. Should I build my own seating or purchase pre-made seating?
Building your own seating offers a sense of accomplishment, and customization, and can often be more budget-friendly. DIY fire pit seating ideas allow you to tailor to the specific dimensions and aesthetics of your space. On the other hand, purchasing pre-made seating can be a time-saver, ensuring immediate quality and durability without the need for tools or skills. The choice hinges on your comfort with DIY projects, the unique requirements of your space, and your budget.
3. What materials should I use for my seating, such as wood, stone, or metal?
Each material brings its own aesthetic and functional benefits. Wood offers a warm, natural look but may require maintenance against weathering. Stone, particularly for fixed seating, is durable and offers a rustic appeal. Metal, especially treated or coated varieties, provides a sleek, modern look and is long-lasting. Consider the overall design of your outdoor space, maintenance willingness, and the climate of your region when deciding.
4. How can I make my seating comfortable and weather-resistant?
Comfort can be enhanced with cushions, throw pillows, and ergonomic designs. For weather resistance, choose materials like treated wood, stainless steel, or weatherproof fabrics for cushions. It’s advisable to get removable cushions so they can be stored during inclement weather or off-seasons. Additionally, applying weather-resistant coatings or sealants can further protect your seating.
5. What design elements can I add to my seating area to make it visually appealing?
Introducing diverse textures, patterns, and colors can elevate the visual appeal of your seating area. Consider decorative cushions, artistic metalwork, or unique wood finishes. Integrating planters, ambient lighting, or water features can also enhance the ambiance. Remember to maintain a balance; while it’s good to have focal points, the seating area should feel harmonious with the broader outdoor space.
6. What Can You Put on the Ground around a Fire Pit?
I’ve also prepared some ideas about what you can put on the ground around your fire pit, hope it will help you:
- Pea gravel: Pea gravel is a popular choice for fire pit areas because it’s comfortable to walk on, doesn’t cost much per bag, and doesn’t require precise measurements. It’s also a good option for drainage.
- Stone or paver patio: A stone or paver patio provides a solid and level surface for your fire pit seating area. It’s also a durable and long-lasting option.
- Concrete slab: A concrete slab is another solid and level option for your fire pit seating area. It’s also easy to clean and maintain.
- Grass or turf: If you prefer a natural look, you can use grass or turf as the flooring for your fire pit seating area. However, it’s important to keep in mind that the heat from the fire pit can damage the grass.
- Wood decking: If you have a wood deck, you can use it as the flooring for your fire pit seating area. However, it’s critical to take precautions to prevent damage to the deck, such as using a fire pit pad.
- Gravel: Gravel is a good option for a fire pit seating area because it’s fireproof, provides a level area for seating, and suppresses weed growth. It’s also one of the most affordable options.
This is a very interesting question, which I have answered briefly, mostly with types of materials. In the future, I will expand on this topic – I will write a whole article about it.
In Lieu of a Conclusion
I hope the information provided in the article is helpful and now you have 8 DIY fire pit seating ideas for your backyard or patio. I think they’re good for any type of fire pit, be it propane or wood burning.
With a little imagination, you can create comfortable, budget-friendly seating options for your outdoor fire pit area using reused and repurposed materials you may already have around your home.
If you have any other hand-made fire pit seating ideas, feel free to share them in the comment section below.
Get inspired and put your crafting skills to work!
Follow me:
- Lava Rocks Vs. Fire Glass – What Is Better for a Fire Pit? - November 15, 2023
- How to Light a Propane/Gas Fire Pit with a Manual or Electronic Ignition System - November 8, 2023
- How Long Does a Propane Tank Last for a Fire Pit - October 9, 2023