Flour sifters can be tricky to get clean because of all those tiny holes. Are you really expected to get all the flour off, or is it okay to just put the device away without washing it?
The more time I spent in the kitchen, the more I wondered. And clearly, I’m not alone here:
How the heck do you clean a flour sifter?
— BetsyTietjen (@irishdreamer999) December 14, 2011
Finally, I decided to do some in-depth research on the topic of “How To Clean Flour Sifter” — and to share my findings in this guide.
When you’ve finished reading, you should know:
- Whether or not you really need to clean the sifter
- How often you should do it
- Various cleaning methods — and advice on which ones work best
- How to get rust off the sifter
- What type of flour sifter you should buy
As you can imagine, I researched plenty of forums and articles on the subject to find the information I needed. Between that and my personal experience, I learned a great deal about these nifty devices and the best methods for cleaning them.
Table of Contents
- 1. Do You Need to Clean a Flour Sifter? →
- 2. How Often to Clean Flour Sifter →
- 3. How to Clean Flour Sifter: Tips and Techniques →
- 3.1. Sponge, Soap and Water →
- 3.2. Soaking →
- 3.3. Toothpick →
- 3.4. Toothbrush →
- 3.5. Vacuum →
- 3.6. Compressed Air Device →
- 3.7. Oven →
- 4. Rust Removal →
- 5. Which Is Better: Plastic, Aluminum or Stainless Steel? →
- 6. Can You Wash a Flour Sifter in the Dishwasher? →
- 7. Useful Resources →
Do You Need to Clean a Flour Sifter?
The short answer is no, it’s not necessary to clean flour sifters — at least not after every use (see below). I’ve gone for years without washing my flour sifter, and it never did me or my recipes any harm.

Although you shouldn’t eat raw flour, the ingredient won’t contaminate the sifter the way a raw meat product would. Check out our advice on the best cooking methods for pork and ham hocks here.
That said, if the sifter has become clogged, or if you’ve sifted ingredients like nutmeg and cinnamon along with the flour, it might be necessary to take this step. I’ve run into these situations a few times myself, which is why I put together this guide.
How Often to Clean Flour Sifter
Unless the flour has become stuck in the sifter, just hold it over the trash can and shake it until it’s empty. This is a foolproof “cleaning” method that usually does the trick.
If there are stubborn bits of flour stuck to the sifter, you’ll need to use one of the methods I’ve described below. Which one you choose depends on whether the flour is really caked on, or just unusually clingy.

No matter how often you have to clean it, make sure the flour sifter is completely dry before you put it away. This is especially important with metal sifters that are prone to rusting, as we’ll discuss later on.
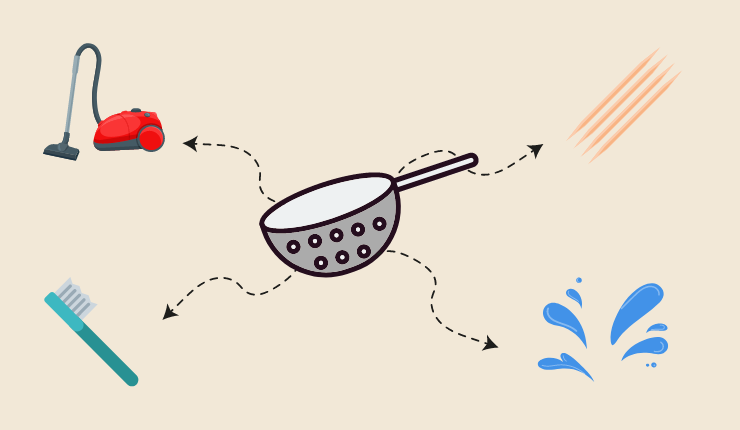
How to Clean Flour Sifter: Tips and Techniques
Here’s where I get technical. The following sections will give you clear instructions on how to clean flour sifter using various methods.
Sponge, Soap and Water
This is a fast and simple technique that should work if the flour hasn’t formed a paste on the sifter.
Submerge the flour sifter in hot, soapy water, then use the abrasive side of a sponge to scrub the mesh. Continue until the device is clean, then rinse under hot water to remove the soap.

Allow the sifter to dry thoroughly before you return it to the cupboard. Otherwise, the flour will get wet the next time you use the device, which means you’ll need to clean it all over again.
The folks at Baking Kneads know what they’re talking about:
It is very important to dry your flour sifter for a few reasons. First of all, if the sifter is wet, the flour will not sift, but will instead clump together and get stuck in the middle section of the sifter.
Check out this video if you’d like a visual demonstration:
Soaking
Sometimes, a simple scrubbing isn’t sufficient:
@altonbrown How do you effectively clean a flour sifter? Not all the flour comes out with soap and water :(.
— Anne N. (@annedn) October 16, 2013
It helps if you soak the flour sifter in hot water and soap for at least 15 minutes before you attempt to clean it. This softens any caked-on flour and makes your job that much easier.
You shouldn’t soak a sifter that’s made of aluminum, as this will cause the device to rust. For stainless steel or plastic sifters, though, it’s a great method.
After soaking, scrub the flour sifter with the abrasive side of a sponge as described above, then rinse it well using more hot water. If you want to dry it quickly, use a hair dryer set on high. Otherwise, you can leave it on the dish rack overnight.
Can you use cold water to clean the flour sifter? Find out more about this technique here.
Toothpick
I don’t often go for the toothpick method because it requires a great deal of patience and attention to detail. Most of the other techniques I’ve mentioned here are more effective and take less time.

That said, you can certainly use a toothpick to remove small patches of caked-on flour. It comes in especially handy if you notice the buildup just as you’re about to use the sifter, since you don’t need to add water to the mix.
Make sure the toothpick (or toothpicks) that you use are sturdy. It won’t work if the wood splinters or breaks in half while you’re working.
Use the toothpick to clean the affected areas, poking it through the mesh until the sifter is clean. If necessary, wipe the sifter off with a dry paper towel afterward.
Toothbrush
A toothbrush is an excellent tool for removing flour that’s clogging the mesh at the bottom of your flour sifter.

To use this method, soak the sifter in hot water and dish detergent for 10 to 15 minutes. Then use a toothbrush to scrub the mesh filter until it’s clean. The bristles should do most of the work for you, so you don’t need to use much elbow grease.
It’s best if you keep a “kitchen toothbrush” on hand for jobs like this one. Bacteria builds up on the toothbrushes we use to clean our teeth, so it would be unsanitary to use your personal toothbrush.
Vacuum
Do you own a vacuum cleaner? Most of us do, at least if there are rugs or carpeted areas in the home. If you do, then you’re in luck — this household tool can be used to clean your flour sifter, in addition to the floor.
To begin, secure an attachment that features a bristled brush to the hose of your vacuum. Make sure the attachment is free of dust and debris before getting started.

Turn on the vacuum and use the bristled attachment to suck the leftover flour out of the sifter. The brush will make it easier to clean up any stubborn bits.
Like the toothpick method, this one has the added benefit of being dry, so you can use the sifter again right away. It’s even suitable if the flour hasn’t adhered to the sifter, but is still in its powdery form.
Compressed Air Device
If you work in an office setting, chances are you’re familiar with compressed air devices. They’re most commonly used to remove dust and debris from computer keyboards, but they work well on flour sifters, too.
Another dry method, this one is simple to use — assuming you have a compressed air device on hand. Just aim it at the affected areas of the flour sifter and press the button that will release a blast of air. The force of the accelerated air should remove any flour that’s stuck to the mesh.
If you’re wondering how this might look, check out this video tutorial:
Oven
This is the method that should remove those stubborn lumps of crust that won’t come off even after a long soaking. Note that it will only work with metal sifters, as the heat of the oven will cause plastic to melt.
Set the oven to 300 degrees and set the flour sifter inside. Let it sit for 10 to 15 minutes, then remove the device, making sure to use oven mitts or pot holders to prevent burns.

At this point, the caked-on dough should be baked, which will make it dissolve more readily. Soak the sifter in hot water until you can scrape off every last bit of residue.
Rust Removal
If your sifter is made of metal (see section below), you’ll have to take care to ensure that it doesn’t get rusty.
The best way to do this is to keep the flour sifter clean and dry. When metal is exposed to moisture, it’s more likely to rust. This is another reason why you should use a hair dryer or put the sifter in the oven to dry for a bit before you put it away.
Investing in a stainless steel sifter can also help you avoid rust. Because the metal contains chromium, it oxidizes rapidly to form a protective coating.
When the flour sifter is properly cared for, it can last for generations:
@altonbrown My mom just gave me her old flour sifter! It hasn’t been used in years. Any tips on how to clean it? pic.twitter.com/nzqyLHp0zW
— Emmie (@Emmie12750) July 29, 2014
What if you take all these precautions and the flour sifter gets caked with rust anyway? Fortunately, there are steps you can take to remove the rust, although it’s preferable to avoid it in the first place.
You can use a small razor blade to chip away at rusty areas. Then wash the flour sifter thoroughly to ensure that all the rust has been removed. Remember that the device needs to be completely dry before you store it.
If you can’t get all the rust off, it’s time to discard the sifter and invest in a new one. Using a rusty sifter could cause particles of rust to fall into your food, which is both unhealthy and unappetizing.
Which Is Better: Plastic, Aluminum or Stainless Steel?
Now that I’ve answered the “how to clean flour sifter” question, you might be wondering what type of sifter you should buy in the first place.
You can find out more about the various sifter types here:
Plastic flour sifters are the least expensive, so they’re a good fit if you’re on a budget. On the other hand, they aren’t very sturdy, meaning you may have to replace your sifter frequently.
Here’s what The Indoor Haven has to say on the subject:
However, it is advisable to get a plastic flour sifter; if you need a sifter you can wash as often as you require. With a plastic sifter, you dry it by leaving it on a rack until it is completely dry as it is not prone to rust.
Sifters that are made of aluminum are prone to rusting. What’s more, the metal is fairly soft, so there’s a good chance you’ll be dealing with dents.
You can expect to spend a bit more on a stainless steel flour sifter. However, you’ll get better value for the money. These sifters are lightweight, durable, and rust resistant, making them my top choice.
If you’re interested in learning more about how various materials can affect your ingredients, take a look at the information in this article.
Can You Wash a Flour Sifter in the Dishwasher?
Yes, as long as the sifter is made of plastic. If you put a metal flour sifter in the dishwasher, there’s a better-than-average chance that it will rust.
Useful Resources
In Conclusion
Knowing how to clean flour sifter is a handy skill for a home chef to have. Even if you seldom have to take this step, it’s best if you’re well acquainted with the various methods.
The process is not difficult, but since it’s not always necessary, many people don’t know where to begin. I hope my guide has answered your questions!
Follow me:
- Lava Rocks Vs. Fire Glass – What Is Better for a Fire Pit? - November 15, 2023
- How to Light a Propane/Gas Fire Pit with a Manual or Electronic Ignition System - November 8, 2023
- How Long Does a Propane Tank Last for a Fire Pit - October 9, 2023